Install Windows 11 Pro in Virtual Machine
- Install and open VMWare Workstation
- Click on Create a New Virtual Machine

3. Select Typical (recommended)
4. Click Next

5. Insert Window 11 Pro DVD in your DVD drive or mount the .iso image you have downloaded (double click on the .iso file)
6. Select the DVD drive or the downloaded .iso image and click Next (7)

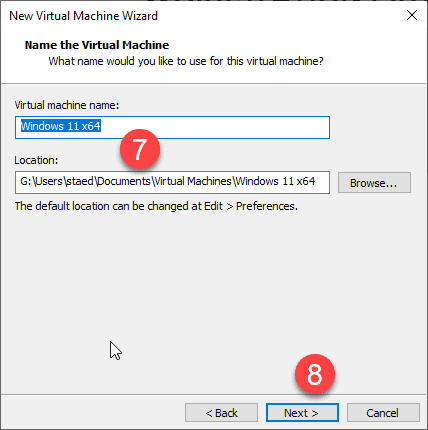
7. Give the Virtual Machine the name you want and click Next (8)
9. In the next step you must set a password. Click Generate to have it generated automatically

10. Click Copy to copy the password to the clipboard and paste it in a safe place where you can find it later.

11. Click Next >
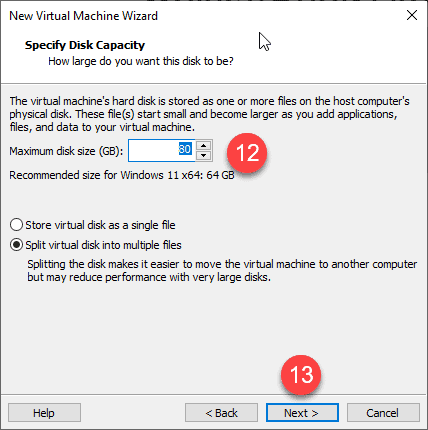
12. Depending on the available hard drive space, set the disk size you want to assign to the new virtual machine.
13. Click Next
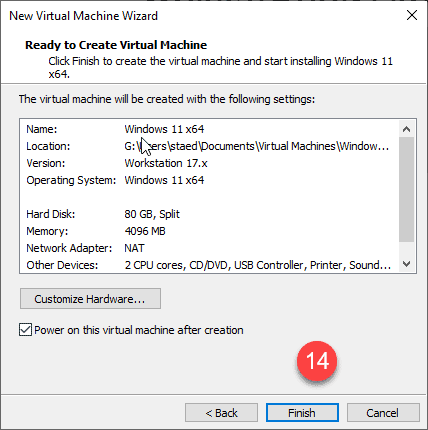
14. Click Finish
15. VMWare is creating the disk. Be patient until it’s done.

16. the Windows 11 Pro installation will commence automatically.

Install Windows 11 Pro
17. In the Boot Manager step, select CDROM Drive and press ENTER
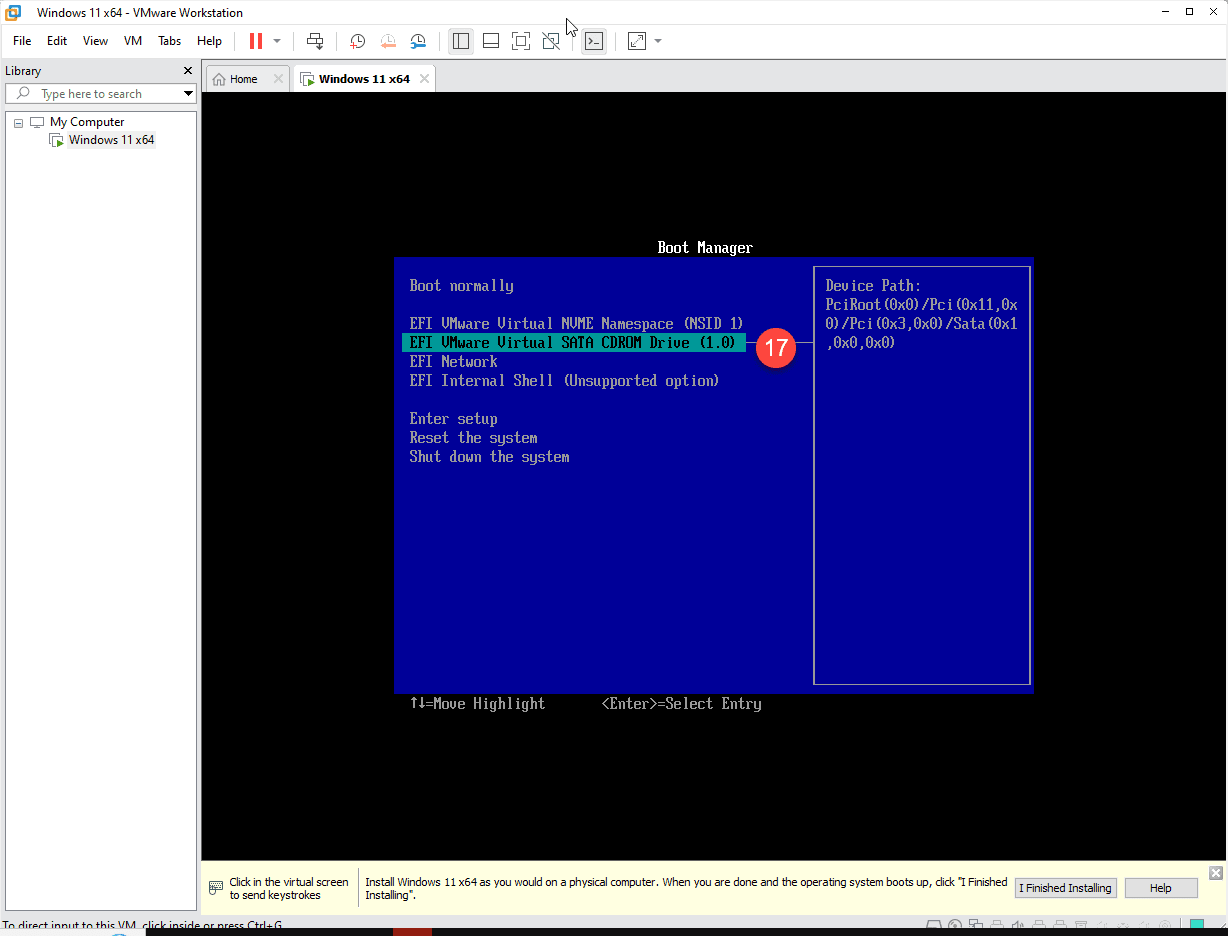
18. On the message “press any key … ” press Space or ENTER
19. Follow the Installation Guide for Windows 11 Pro clean install
20. Let the whole installation completely finish, don’t click I Finished Installing
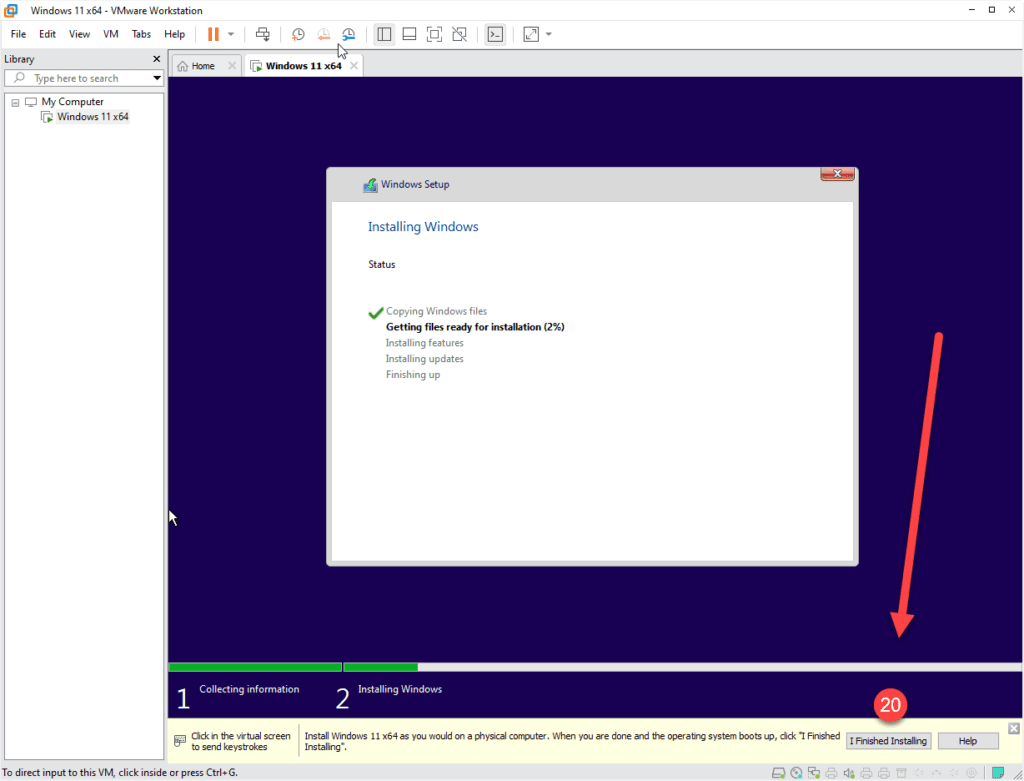
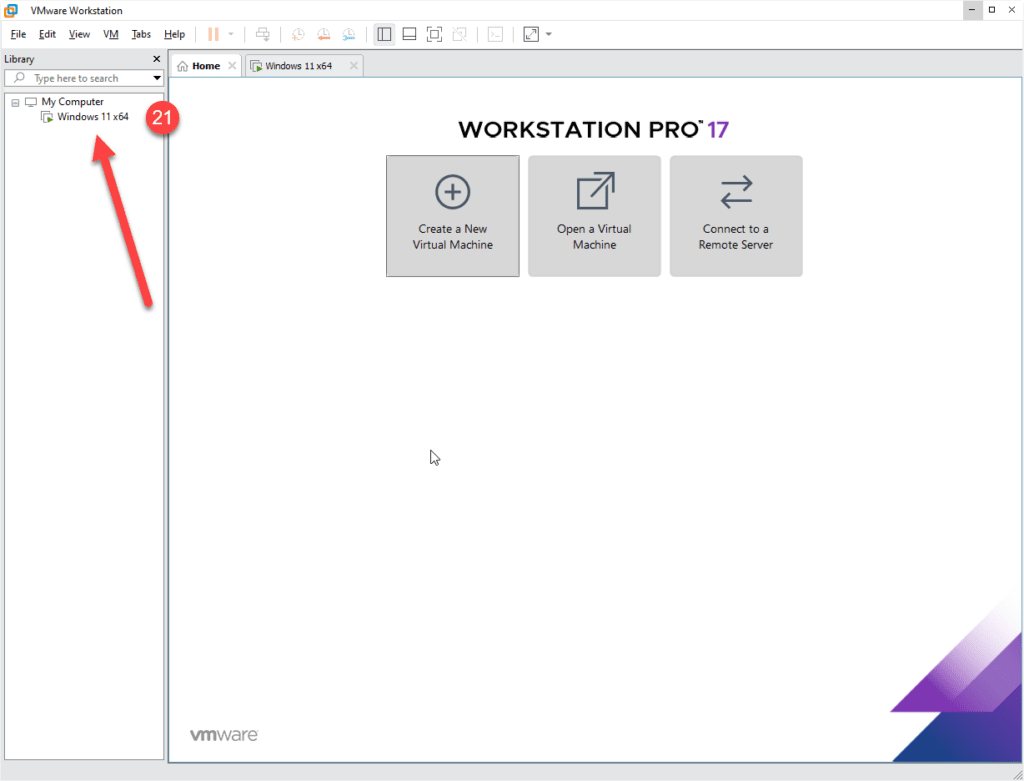
21. When the Installation restarts the VM, you must click on it to resume the process.
22.